Add Details to a Job
Choose the Jobs Icon in the Top Menu to display the Jobs List then select the applicable Job from the List to view the Job Card.


On the Job Card, choose the Details Tab.

1. Enter the Job Details
- Enter a Job Name. Whilst not mandatory, a Job Name is useful when searching for and identifying different Jobs
- Assign the Job to a Team, if required
- Apply a Secondary Status and Priority level if required
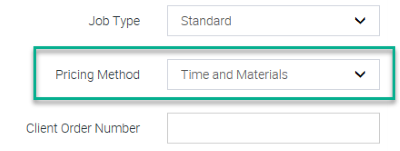
- Select a Job Type. Job Types can be defines and managed in the Administration Settings.
- Enter Client Order and/or Purchase Order Numbers if required
2. Choose a Pricing Method
In Ascora you can choose from three different Pricing Methods:
- Time and Materials – where the pricing for your Job is based on a combination of a labour charge(s) and Supplies costs (plus relevant markups)
- Fixed Price – where the price for your Job is agreed and fixed, regardless of the amount of labour hours and supplies used. When choosing this Pricing Method, you can add the fixed price amount into the fields which display. This can also be done (or edited) by a Mobile User in the field as required
- Sections – typically used for larger Jobs or projects that need to be broken down into smaller parts. When choosing this option, information such as supplies and labour is added to each individual Section Job, rather than to the overall Parent Job. See Create a Section Based Job for further information
3. Choose a Site and Billing Customer. If you created the Job from the Scheduler or from a Customer Card, the Site Customer will be pre-populated.
If you created the Job from the Jobs Screen, click the Select Site Customer button. Choose an existing Customer from the list or create a new Customer by clicking the Create New button.
The Billing Customer will default to match the billing information associated with the selected Customer. If the Billing Customer needs to be changed for the particular Job, click the Select Billing Customer button to action the change.
4. Enter a Job Description. The Description field is mandatory and is of unlimited length – allowing you to record as much information about the Job as you require.
5. Confirm or Edit the Job Address. The Job Address will default to the address associated with the Site Customer. You can edit this address if required.
6. Select a Job Checklist (if required). When you include a Checklist on a Job Card, the User conducting the Job will be required to work through and tick-off the Checklist before they can finalise the Job.
7. Once you have completed entering the Job Details, click the Save button.
Got a Question? Contact our friendly team
Get it now from an App Store