Create a New Job
New Jobs can be created in a number of different ways in Ascora: -
- From the Job List
- From the Customer Details
- By Converting a Quotation
- By Clicking and Dragging on the Schedule
Depending upon your particular workflow, one way may be faster/easier for you - for example recording a new Maintenance Job over the phone with the Customer is usually easier from the Scheduler as you can create the Customer, Job and Booking all in one go.
Creating a New Job from the Jobs Screen
Click Jobs in the Top Menu to display the Jobs List.

Click the +New button to create a new Job.
Creating a New Job from a Customer Card
Click Customers in the Top Menu to display the Customers List.

1. If the Job is for an existing Customer, find their record in the Customer List and click the View button located next to the Customer Name. See Search for an Existing Customer for assistance.
If the Job is for a new Customer, create a new Customer record by clicking the +New button. See Create a New Customer for assistance.
2. Click the New Job button in the toolbar to create a new Job. The new Job Details will display with the Customer information automatically populated.

Creating a New Job from the Scheduler
Choose the Scheduler Icon from the Top Menu to display the Scheduler.

Choose Jobs from the Add by Default option box. You can configure this default option by going to Administration > Default Settings > Scheduler.

1. Hold the mouse pointer over the time and User for which you want to schedule the Job. Click-and-Drag to schedule the Job for your chosen duration.
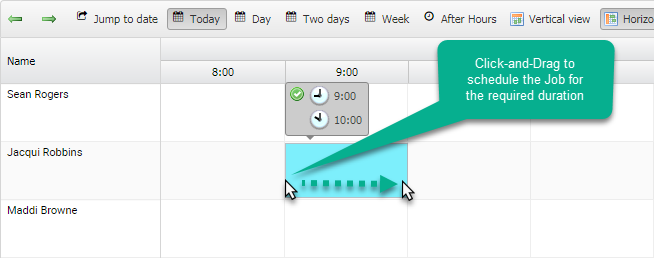
2. When you release the mouse button the Customer Selection screen will display.
If the Job is for an existing Customer, find their record in the Customer Selection list. Click on the Customer then click the Next-> button. See Search for a Customer for assistance.
If the Job is for a new Customer, click the Create New Customer button to create a new Customer record. See Create a New Customer for assistance.
The Job Details screen will display.
3. Enter the details for the Job:
- Choose a Callout fee from the dropdown menu if required
- Select a Job Type from the dropdown menu
- Add a Time Window if required - Time Windows allow you to specify a rough time to the client - for example from 9-12
- Enter a Job Description. Note that this is mandatory and can be of unrestricted length, allowing you to include as much detail as required
- Enter a Client Order Number and Purchase Order Number if required
- Select a Priority level from the dropdown menu if required
- Enter any relevant Booking Notes. These will be viewable on the Mobile App.
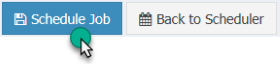
4. When you are ready, click the Schedule Job button.
To display the Job Details, double-click the Job in the Scheduler then click the View Full Job Details button.

Got a Question? Contact our friendly team
Get it now from an App Store