Integrating Ascora with MYOB Live
Ascora can integrate directly with most major accounting packages – Xero, QuickBooks, MYOB Live and MYOB Essentials. Ascora runs two-way, full integration which means data will flow from Ascora into your accounting package as well as from your accounting package back into Ascora to ensure your Customers, Invoices and Payments are always synchronised. To connect Ascora to your MYOB Live Accounting Package:
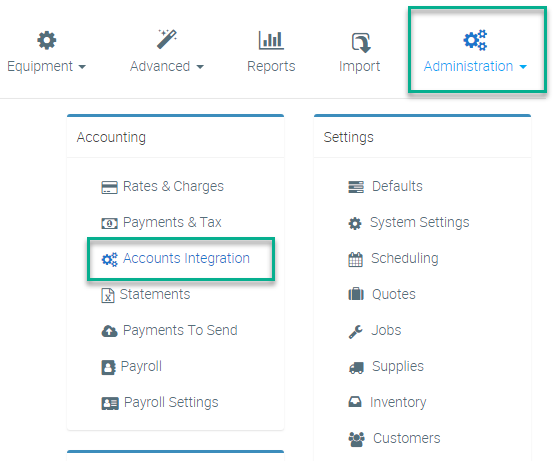
1. From the Administration Icon in the Top Menu, choose the Accounts Integration option.
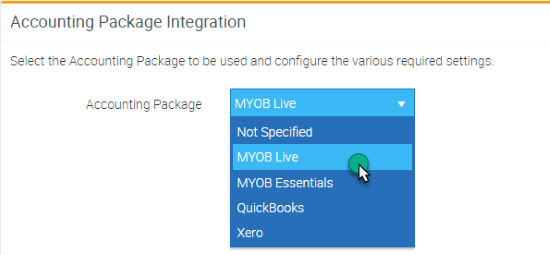
2. Select MYOB Live from the dropdown list. A summary will display on the screen to explain the integration further.
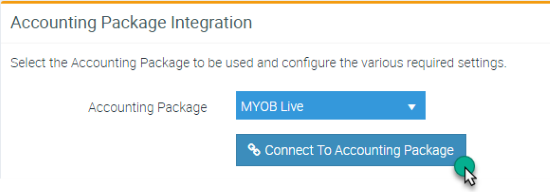
3. Click the Connect to Accounting Package button to commence the integration. You will be re-directed to MYOB Live to authorise Ascora to access your accounting data.
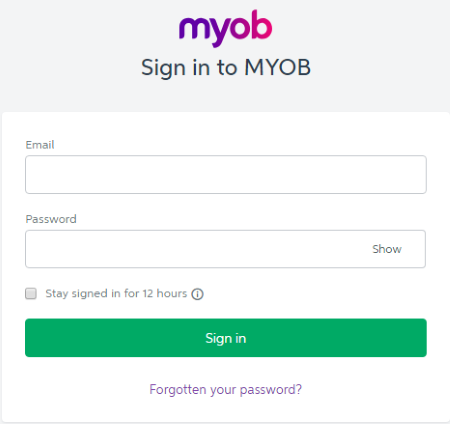
4. Enter your MYOB Live log-in details and click the Sign in button.
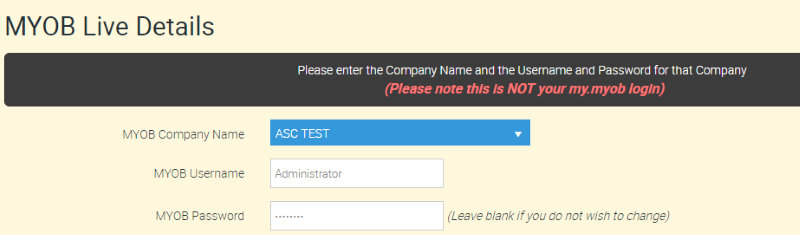
5. Once you have logged in to MYOB Live you will be redirected back to Ascora. At this point you need to select the relevant Company File and enter the MYOB User Name and Password associated with that Company.

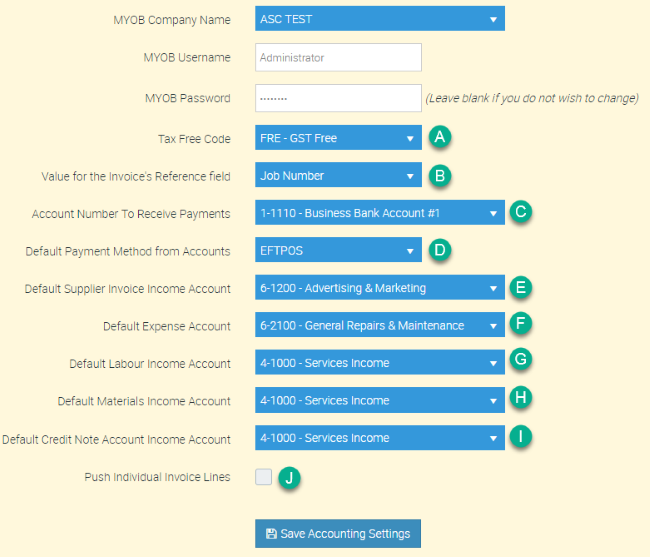
6. Click the Save Accounting Settings button. If the MYOB Username and Password have been entered correctly you will see the various Account Code boxes will have been replaced with dropdown menus. These tell Ascora which account codes in MYOB Live to send different information to. Work through the list and select the applicable account codes from the dropdown lists. When you are ready, click the Save Accounting Settings button again.
A – Select the Tax Free Code from your MYOB Live accounts
B – Choose Job Number for the Value of the Invoice's Reference field
C – Select the account to record customer payments that you capture in Ascora. Ascora will also poll this account to pull-down payment information recorded directly in MYOB Live and mark the applicable invoices as paid in Ascora (for example, when a customer pays by direct debit and you reconcile that payment in MYOB Live via your bank feed)
D – Select the default payment method used by your customers. You can override this default when recording payments in Ascora
E – Select the account for Ascora to push Supplier Invoice income *******
F – Select the default account to record Expenses. You can override this default when recording Expenses against a Job
G – Select the account to record income from Labour
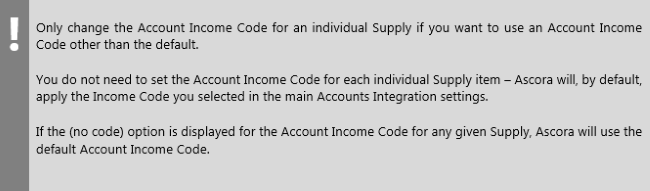
H – Select the default account to record income from the sale of Supplies. You can set different Materials Income Accounts for specific Supply Items if required - see Configure Specific Account Codes for Individual Supplies
I – Select the default account for recording credit notes issued to Customers
J – Tick the checkbox to push line items on an invoice across to MYOB Live, in addition to the Invoice summary information
7. Ascora is now integrated with MYOB Live and will ask if you wish to import customer information. Click Yes, import all my customers to import customer information from MYOB Live immediately. Alternatively, click Not right now to import data at a later time using the Import Icon in the Top Menu.
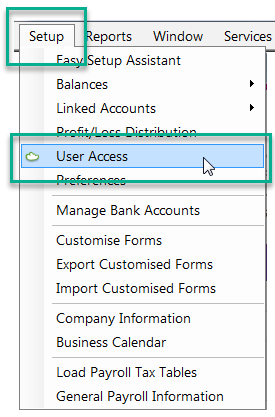
If preferred, you can create a new User Account for Ascora in your MYOB Live Account. To do this:
8. In your MYOB Live Account, under the Setup Tab choose the User Access option.
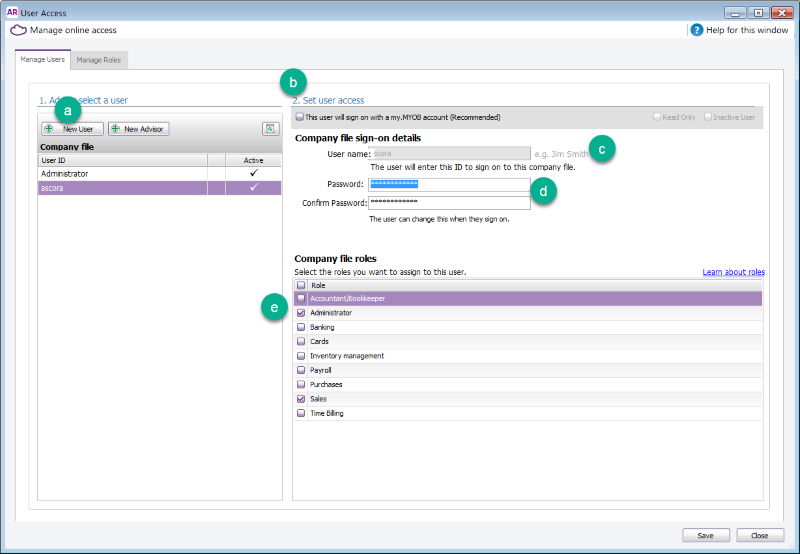
9. Set up the new user by completing the required details:
A – Click New User to create a user
B – Set up the user access – DO NOT tick the option for “This user will sign on with a my-MYOB account”
C – Enter a User name (for example, Ascora)
D – Create and confirm a password
E – Tick to assign the user as an Administrator role
Configure Specific Account Codes for Different Job Types
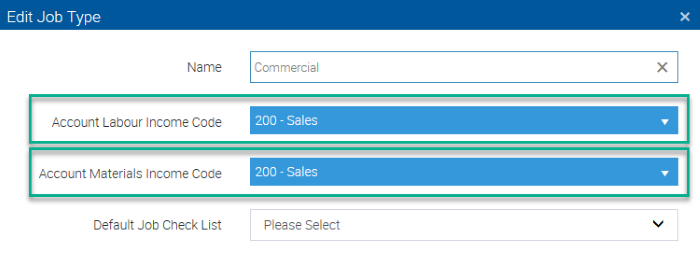
When you create a Job Type in Ascora, you can choose to assign unique Labour and Materials Income Account Codes to it. For example, you can set a Domestic Job Type to push income to Domestic Labour and Domestic Materials income accounts in MYOB Live.
Note that you do not need to configure specific Account Codes for different Job Types - any Job Type that does not have a specific Labour and/or Materials Income Account Code assigned to it will use the default Labour and Materials Income Account Codes configured in the main Accounts Integration settings.
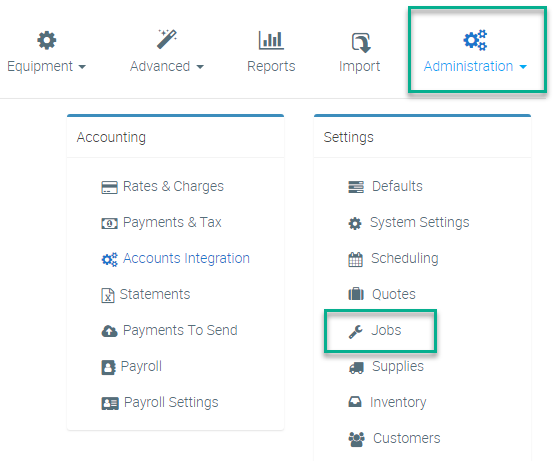
1. From the Administration Icon in the Top Menu, choose the Jobs option.
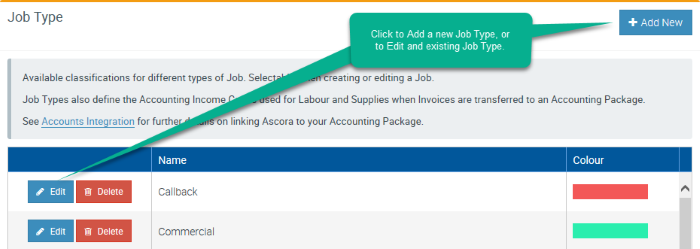
2. Under the Job Type section, click the +Add New button to create a new Job Type, or click the Edit button to edit an existing Job Type.
3. The Job Type details pop-up window will display. Select the required Labour and Materials Income Account Codes from the dropdown lists then click the Save button.
Configure Specific Account Codes for Individual Supplies
You can configure Ascora to push income generated from a specific Supply Item into a specific Income Account Code in MYOB Live. This would typically be used when, for example, you charge out a rate for the use of a particular piece of equipment and have the equipment listed as a Supply in Ascora. By specifying a unique Income Account Code, you can track income specifically generated by that piece of equipment.
1. From the Inventory Icon in the Top Menu, choose the Supplies option.
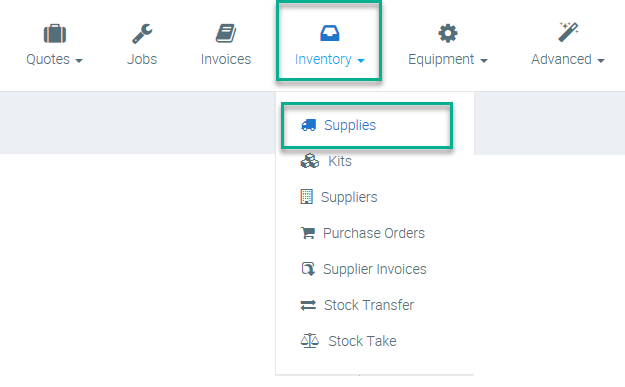
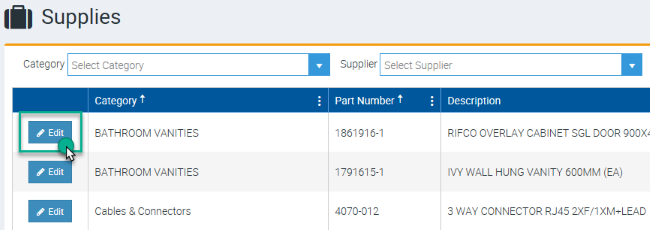
2. Locate the Supply in the Supplies List for which you wish to apply a specific Income Account Code and click the Edit button.
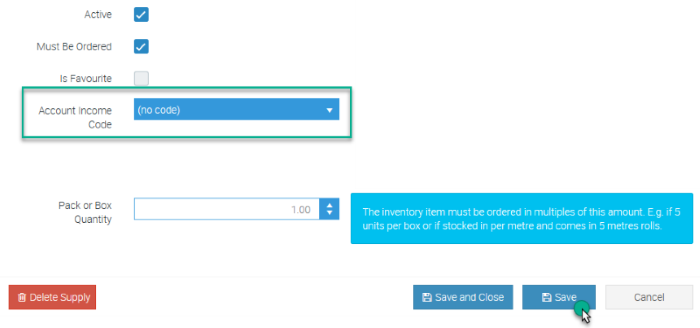
3. The Edit Supply pop-up window will display. Select the applicable Income Account Code from the dropdown list then click the Save button.
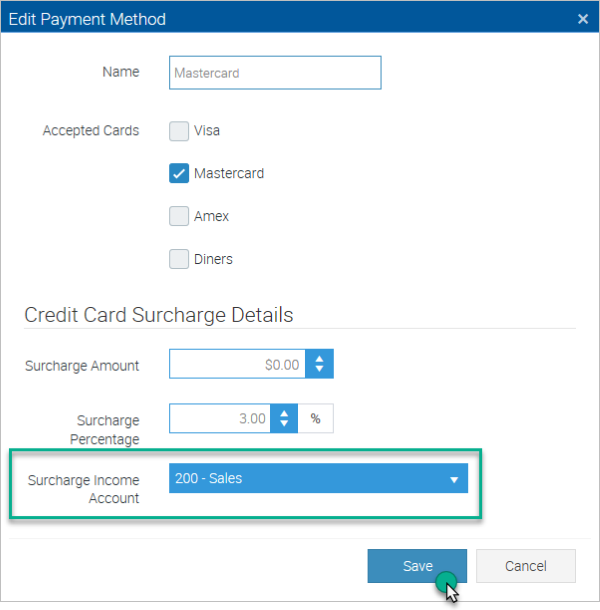
Configure Account Codes for Credit Card Surcharges
Ascora allows you to (optionally) apply surcharges to credit card payments. You can apply different surcharge amounts to different card types if required and you can also define the Account Code in MYOB Live for Ascora to push Surcharge Income into.
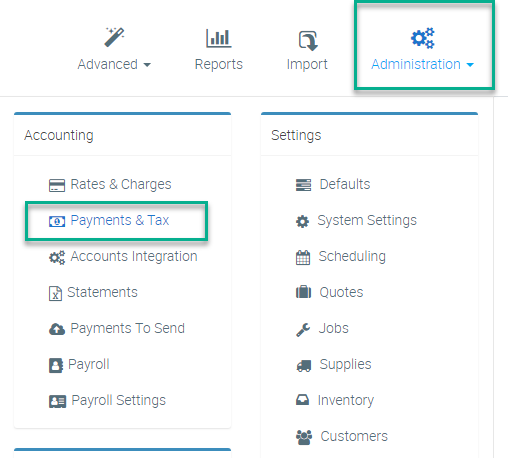
1. From the Administration Icon in the Top Menu, choose the Payments & Tax option.
2. Under the Payment Methods section, click the +Add button to add a new Payment Method or click the Edit button to edit an existing payment method.
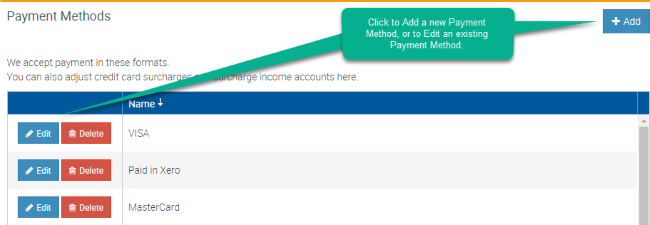
3. The Payment Method pop-up window will display. Select the applicable Surcharge Income Account Code from the dropdown list then click the Save button.
Got a Question? Contact our friendly team
Get it now from an App Store